Routes
Selected Routes
This will show how many routes and stops have been selected.
Clicking the "Edit routes" button will open the route editor map.
Route Editor
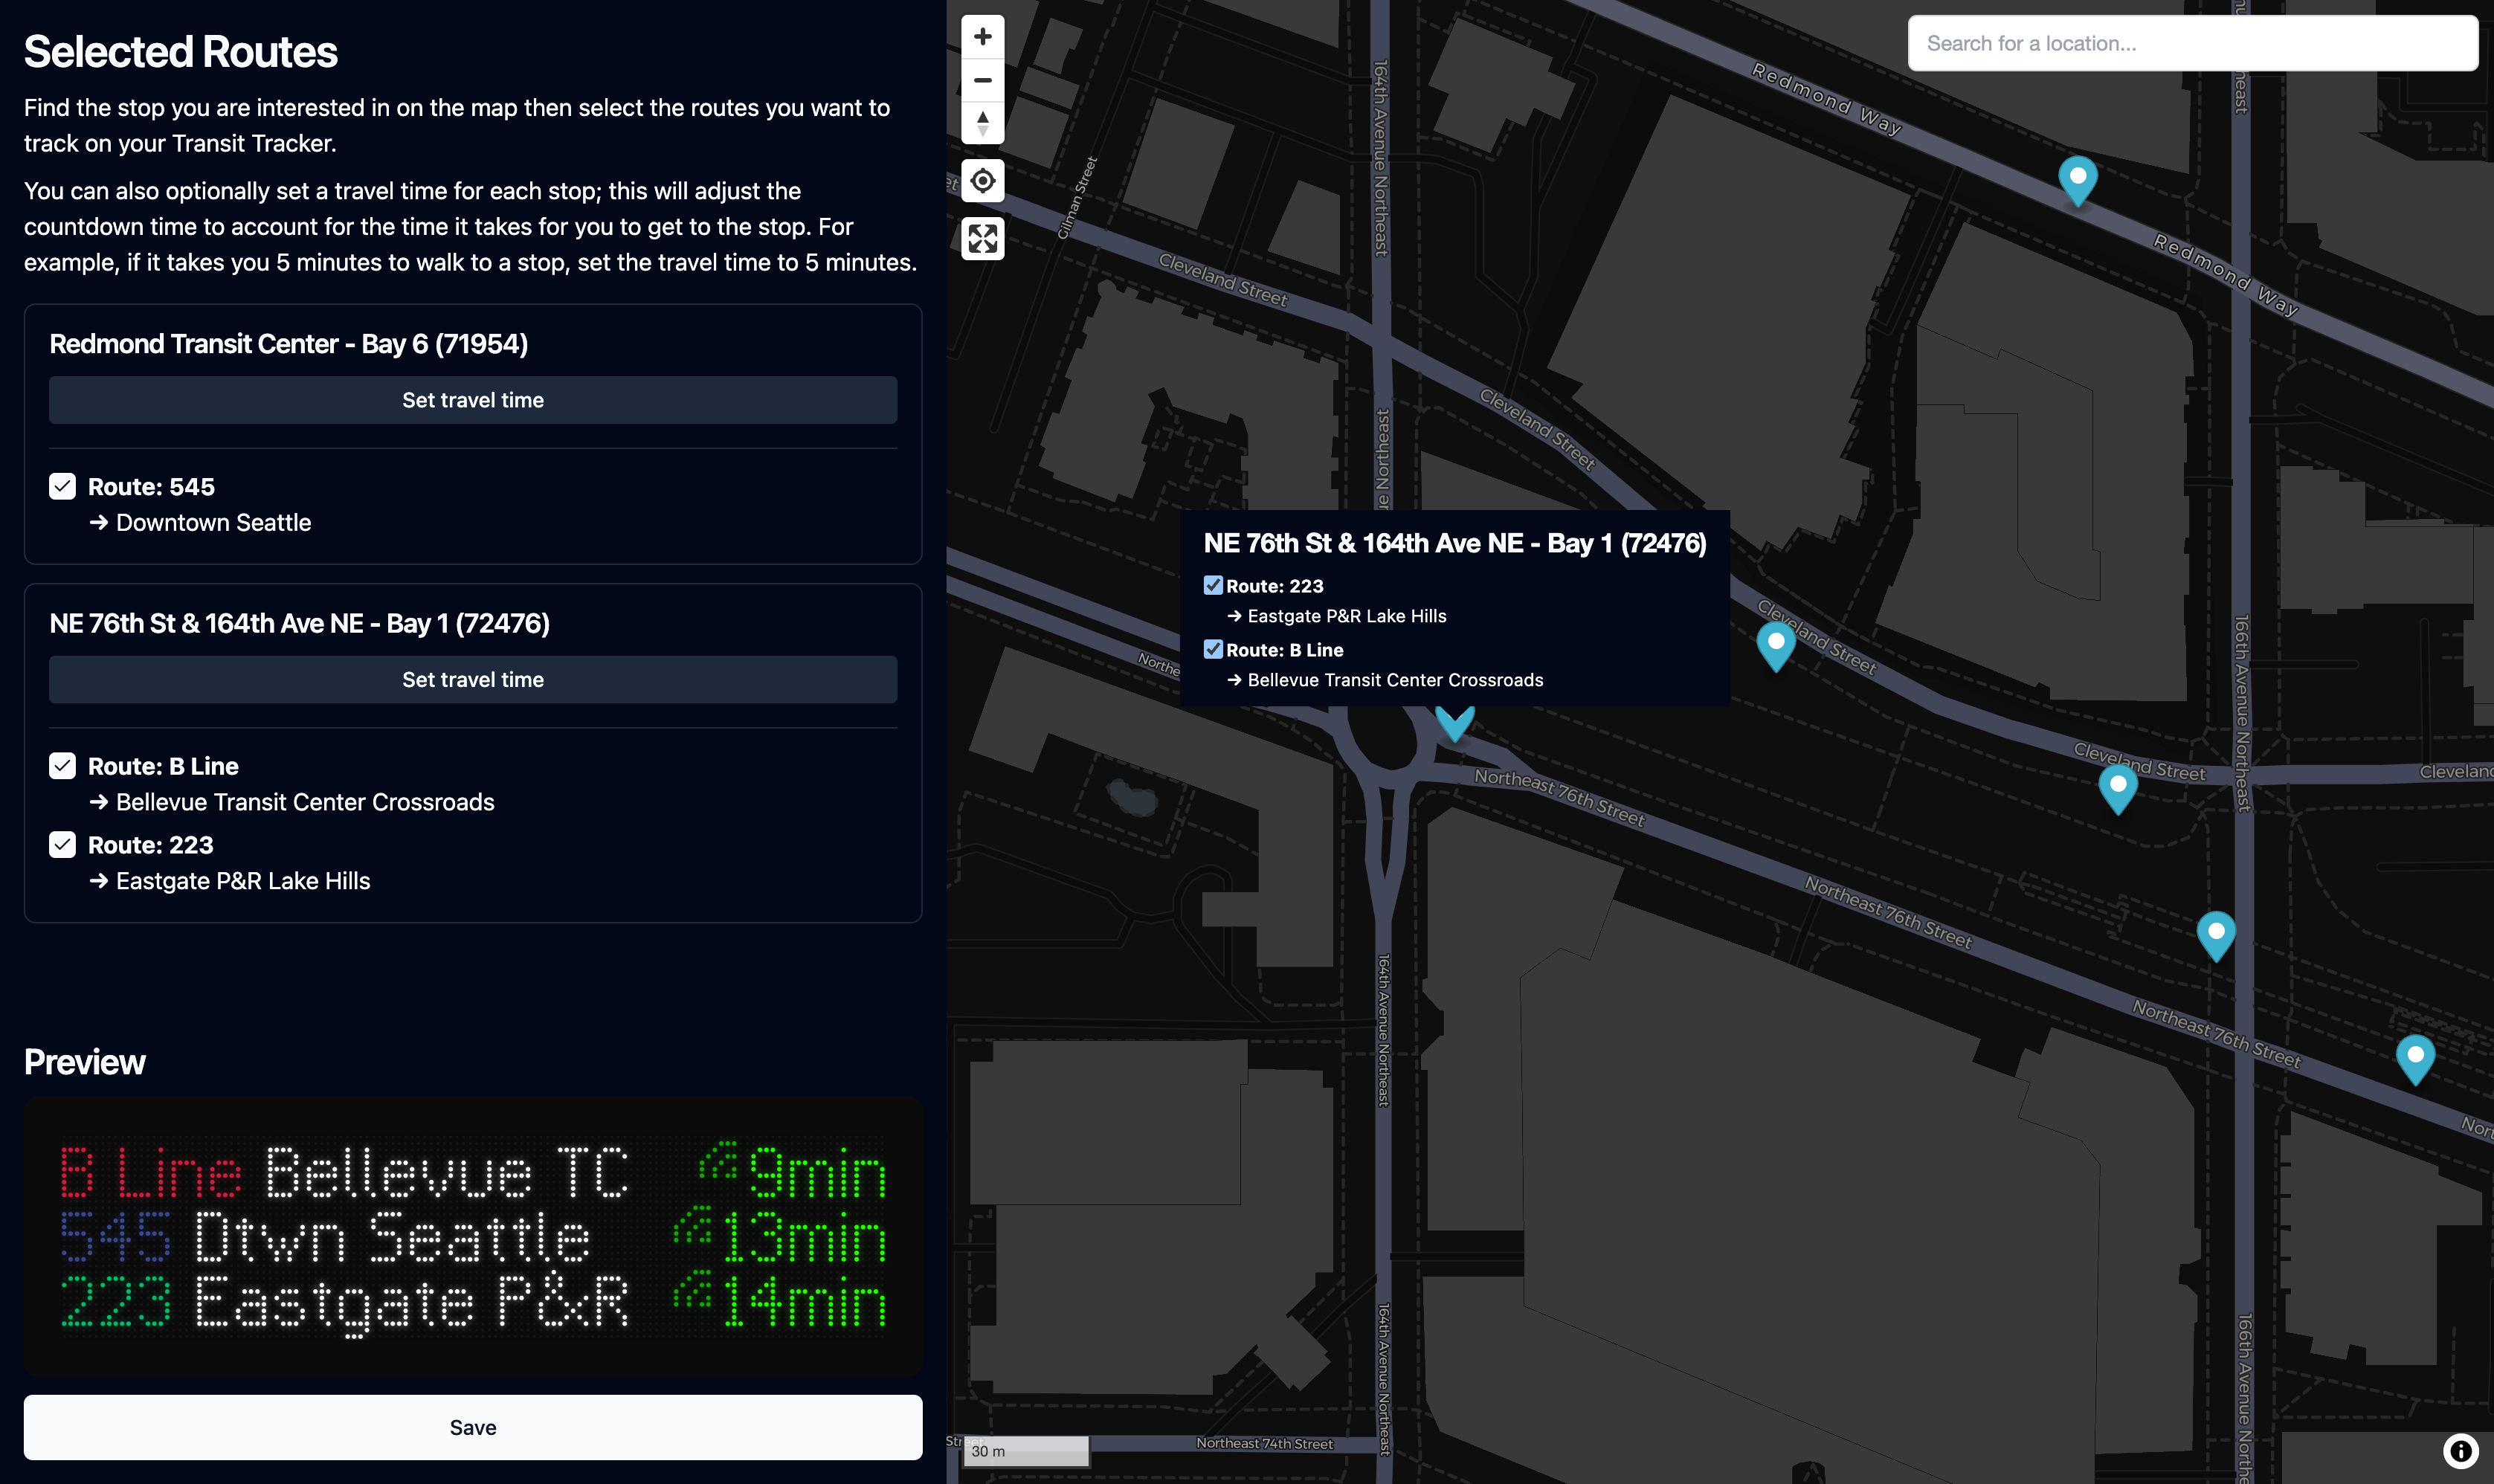
Find the a stop with departures or arrivals you want to track, click it, then select the routes you want to track.
Travel Time
You can adjust the arrival/departure times shown on your Transit Tracker by pressing the "Set travel time" button under the stop name. Set the travel time to how long it takes for you to walk/bike/roll to the stop, and the times on your Transit Tracker will be adjusted accordingly.
For example, if you set a travel time of 5 minutes, and the next bus is scheduled to arrive at the stop in 15 minutes, your Transit Tracker will display 10 minutes. This effectively gives you a "leave by" time and hides any trips that you would not be able to catch in time.
Time Display
This option controls whether the displayed times count down to the next arrival or the next departure. It may be useful to choose departure if, for instance, your train or bus typically lingers at a station for a while before leaving.
Time Units
You can change how the time units are displayed depending on how compact you want it to be.
| Option | Minutes Example | Hours and Minutes Example |
|---|---|---|
| Long | 15min | 1h15m |
| Short | 15m | 1h15m |
| None | 15 | 1:15 |
Schedule Mode
This option controls how the routes are displayed in the list. You can choose between two options:
- Show trips from all routes sequentially: This will show all trips from all routes in a single list, sorted by time. This is the default option.
- Show only the next trip for each route: This will show only the next trip for each selected route. This is useful if one of your selected routes is much more frequent than others.
Headsign Overflow
The headsign is the piece of text which typically indicates the destination of a trip. These can often be longer than the available width on the display, so you can choose how to handle this. We generally recommend setting up abbreviations so that the entire headsign can fit on the display, but if that's not possible you can choose one of the following options:
- Hidden: The headsign text will be cut off.
- Scroll: The headsign will scroll across the display to reveal the full text.